Cement Tiles Installation and Care
Before choosing cement tiles for your project, please keep in mind that cement tiles are handmade and unfired. Each tile is unique, which means that there may be color nuances from one batch to another or even in the same batch.
Installation is not complicated, but requires a meticulous job, respecting the procedure detailed below.
In order to achieve perfect tiled floors, installation must be done last, for new construction or renovation, after all other teams have completed their work (plumbing, electrical, carpentry, paint, etc.).
Step 1, Layout & Setup of the Cement Tiles
Make a precise layout and set the tiles down “dry” (without mortar nor glue) to make sure the shades blend well and that you are satisfied with the overall look. The base must be perfectly dry and graded evenly.
For a floor installation, you must leave 20 mm of reserve: 16 mm for the tile and 4 mm for the adhesive/glue.
Tiles with a dominant black colour must be washed before installation to avoid disgorging of the black colour to the lighter coloured parts. Tiles should be washed with water and a neutral oil-free soap or a scouring cream, and a scrubbing sponge.
Cutting is done with a water saw (full diamond blade).
Step 2, gluing the Cement Tiles:
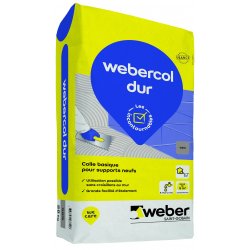
Cement tiles must be installed with glue exclusively, with double bonding. (Do not use glue that is too flexible). Use an adhesive mortar specific for the base.
Evenly apply the glue to the base floor and the back of the tile (double bonding) with a wide notch trowel, ensuring there is no gap under the tile. Level the tiles with manual pressure (never use a tool such as a rubber hammer) and leave a space of 1.5 mm between tiles for grout.
Step 3, cleaning:
It is essential to clean the tiles right before they are installed (and not once the installation is finished) with a sponge, water and a neutral oil-free soap or scouring cream.
Use the scrubbing side of a sponge to smooth out the roughness of the tile. For large surfaces, use a medium/hard mono-brush machine (black scrubbing disc) and a wet/dry shop vacuum to speed up the process. Repeat until you obtain a clean and smooth-to-the-touch surface.
Since cement tiles are unfired, it is normal and necessary that the tile disgorges (producing foam the same colour as the tile’s). If you install tiles in a checker pattern, please rinse the foam as it comes out so that the colours do stain one another. This step must absolutely precede the tile’s sealing.
Never use acid (even diluted) or bleach on cement tiles. To get rid of construction marks and white streaks, the only solution is to rub the tiles with a scrubbing sponge, water and neutral oil-free soap, or with auto-body fine-grit sandpaper with water (never dry).
If a few traces remain, they will fade by themselves as you wash them.
Step 4, first sealant layer:
Once the cleaning is done, the tiles must be fully dry before being treated with the first coat of waterproof sealer, pore filler or resin.
Place a white sheet of paper on the tiles overnight to test if the cement tile is dry. If the paper is curled the following morning, the tiles are still wet.
We recommend FILAWET treatment product, which we can supply. It is not a varnish but an impregnating agent, designed to penetrate the coloured layer, which will not give the tiles a glossy finish. It must be applied in a thin layer with a white cloth.
A resin can be used instead of FILAWET for walk-in showers and exterior walls. It must be applied with a roller to create a protective film (stain and UV resistant) on the tile’s surface and before grouting to prevent the grout from penetrating the tile and staining it. Let the tiles dry for at least one day after sealing.
Step 5, grouting:
Create 1.5 mm joints and fill them thoroughly using high-quality grout. Use light grey or white grout in all cases. Avoid coloured grout for cement tiles because the pigments could diffuse into the tiles and stain them irreversibly. Clean the tiles’ surface thoroughly to remove any grout residue: scrub with a sponge, water and a neutral oil-free soap, rinse, finish by wiping with a chamois or cloth (to avoid drips) and let dry.
Step 6, second sealant layer:
Apply the second coat of pore filler (with a white cloth) or resin (with a roller) to protect the tiles and grout.
To protect the tiles during construction work, avoid covering them with plastic that will trap moisture and cause stains, use cardboard protection instead.
Step 7, finishing (optional):
For “dry rooms” such as kitchen, living room, dining room, entryway, etc., you can apply a light coat of FILASATIN natural transparent wax with a white cloth, giving a patina effect and increased protection. (Do not polish).
The wax is not suitable for wet rooms (like bathrooms) as it makes the floor slippery when wet.


